
I’ve already written about the basics of Datamerge, why it’s so cool, and why you should use it for laying out your card files, whether you’re a publisher or a designer. In this post I’m going to talk about three expert tricks that every Datamerge user should know how to do! And here they are:
- How to Datamerge a row of icons using text frames
- How to Datamerge accents and special characters without breaking
- How to Datamerge icons and special formatting directly into text
- Some notes on Datamerging icons into centered text
How to Datamerge icons directly into an ability is the one I get asked for most frequently
To follow along at home, you can download the example files here, and see the spreadsheet I used for it here. You can get the cleaner version of the Datamerge icons-in-text spreadsheet template here. Feel free to make a copy and use it for your own project!
1. Rows of Icons
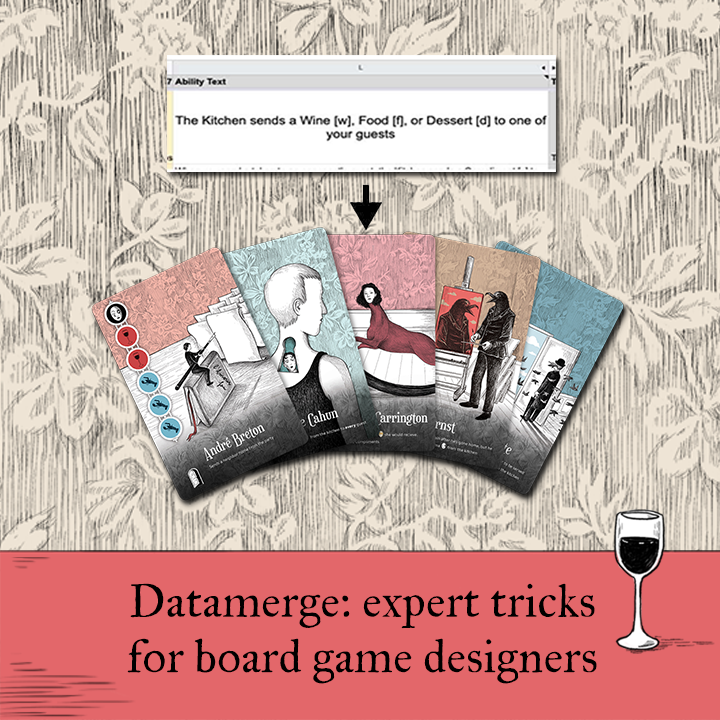
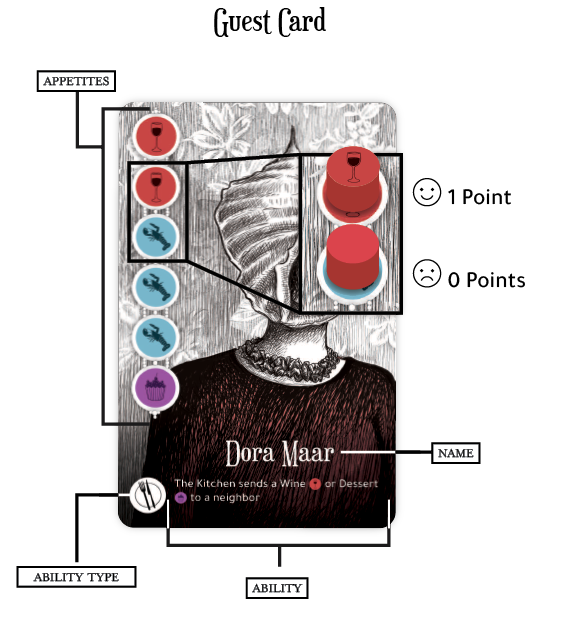
One of the most common ways I find myself using Datamerge is to create a row or column of icons, like in the Surrealist Dinner Party guests’ “appetites.”
 For the longest time, I would create these by simply putting out the correct number of image frames and merging them normally.
The problem: this leads to inflexibility. It’s annoying if you need to change the layout of the icons, and if you wanted them centered on the card you might have to create two separate sets of icons—one set if there’s an even number, and one if there’s an odd number.
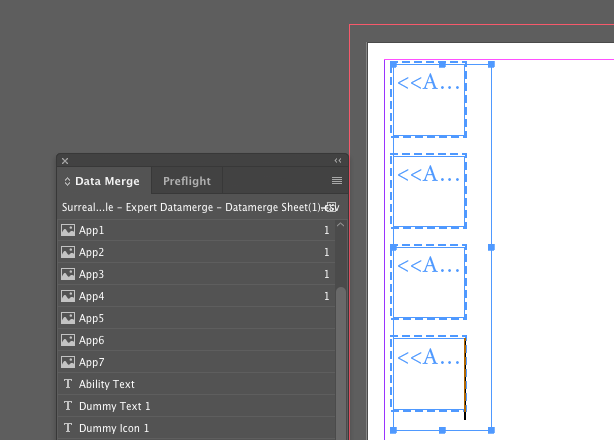
The solution: InDesign allows you to place images inline with text. Create a text frame, and then double click within the frame to start typing. Instead of actually typing words, click each of your icon columns from your spreadsheet to insert them into the text frame, like this:
 Now you can manipulate the text frame to have it change the layout of the icons. If you want your icons left-justified, or you’ll always have the same number of them, you’re all set. If you want to center your icons, simply set the text frame to centered text (you’ll probably also want to make sure your spreadsheet fills its icon columns from the center outward). Want a column of icons instead of a row? Just make your text frame tall and thin!
2. Accents and Special Characters
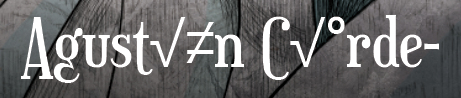
The problem: early in the development of Surrealist Dinner Party, we discovered that Datamerge couldn’t easily handle the accents in many of our artists’ names, and since the artists are real people, we couldn’t leave out the accents. For a while, we were relying on finding and replacing the accented characters in InDesign after merging. For example, this is Agustín Cárdenas’s name:
 .CSV files downloaded from Google Sheets actually handle accents just fine. And it turns out Datamerge does, too. But for some reason, InDesign expects a different character encoding for the CSV file than Google Sheets provides.
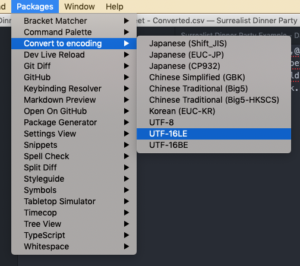
The solution: change the encoding of the CSV file before loading it into InDesign. There are many ways to do this, but I use the Atom text editor, with the Convert File Encoding plugin. In Atom, open the CSV file downloaded from Google Sheets. From the top menu, select Packages→Convert to encoding→UTF-16LE. Then save as. Finally, select the newly saved file as your data source in Datamerge. Now all of your accents should merge just fine!
 3. Icons in Text
The other most common request I get is “how do I Datamerge icons inline in my text?” This is a pretty common use case, as many games (including Surrealist Dinner Party) include icons within abilities. As I mentioned in section 1, InDesign easily handles including images inline with text. So shouldn’t it be easy to Datamerge icons into text?
How to Datamerge icons directly into an ability is the one I get asked for most frequently
The problem: unfortunately, every column in a Datamerge spreadsheet must be for an image or for text. This means that you can’t just type “icon.png” into your text column and have it appear in the middle of the text.
The solution here is a bit complex, so I wanted to mention a stopgap possibility: you can always put “[ICON]” in your text columns, and then use InDesign’s find and replace tool after Datamerging to put your icon into the text box. Simply paste your icon into your file after Datamerging, then copy it to the clipboard. Open the find and replace menu. Put “[ICON]” (or whatever your search text is) into the search text field, and click the arrow next to the replace field and select “Clipboard contents.” Then press the “Replace All” button.
The solution: the full-scale solution here revolves around having extra columns in your spreadsheet. Create alternating columns: Text1, @Icon1, Text2, @Icon2, etc. Then in your InDesign file, put them in one text frame in order. Now you have a text frame that alternates text and icons. Now if you’re writing an ability with no icons, put the text in Text1. If you have one icon between two sentences, put the first sentence in Text1, the icon in @Icon1, and the second sentence in Text2. If you have 2 icons between the sentences, you’ll leave Text2 blank, and put the second sentence in Text3.
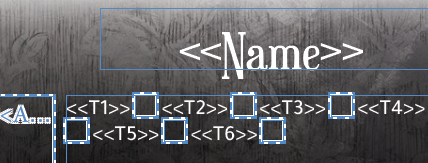
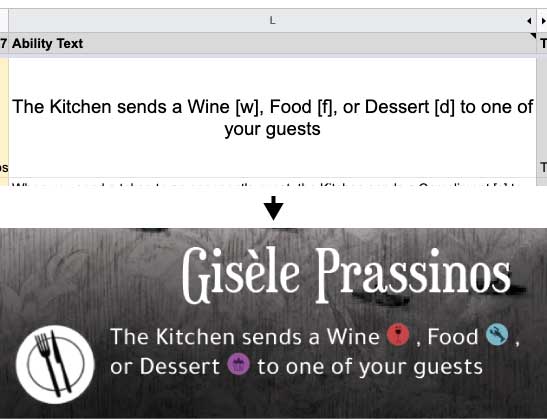
This is what your ability text field should end up looking like.
This solution works pretty well, but it’s annoying to write your abilities this way. I’ve developed a little spreadsheet template that you can find here. It will automatically split up your text from a single cell and your icons into the columns so long as your icon names are wrapped in [square braces], so you can write like a person and not like a robot!

My spreadsheet formula automatically splits simple ability text with icons into alternating columns of text and icons.
Note: for some reason Datamerge gets rid of trailing and leading spaces (even though my spreadsheet does not). If you want spaces before and after your icons, put spaces between the text and image placeholders in your InDesign document.
4. Icons in Text, Centered
If your text needs to be centered on the card, that makes things much more difficult. Hold on to your butts, this is about to get weird.
Problem: extra icon frames throw off the centering of your text/ability.
Solution: when merging, in the “Options” tab select “fit frame to images,” and then replace all of your blank icon cells with a 1×1 pixel image called blank.png (the spreadsheet has a spot to do this automatically in the icon definitions tab). This shrinks the unused frames down tiny.
Problem: now my merged icons are HUGE!
Solution: that’s probably because you’re using a 300DPI .jpg or .png file. These are web file types, so InDesign assumes they are 72DPI (standard web resolution), and places them around 4 times as large as you want. You could shrink your images, but that will make them blurry. Instead, save them out as 300DPI .psd or .ai files at the correct inch dimensions of the frames you’re placing them in.
Problem: now the spaces between my tiny blank.png images are throwing off my centering!
Solution: take the spaces between your placeholders in InDesign out, and add little padding around your icons, so each icon file has a bit of blank space to its left and right.
Problem: now when I put 2 icons next to each other, there’s a big space in between that I don’t want.
Solution: uhhhh…. Maybe make 2 sets of icons—ones with padding next to them and ones without? The most robust way to do this would be to have the spreadsheet automatically detect whether icons have spaces to their left or right, and then populate a thin spacer frame to the left and right of each icon with either a spacer image, or the blank.png 1×1 pixel image. I don’t have time to do this right now, but if someone else wanted to take a stab at it, I would be happy to share a link to the edited spreadsheet.
Hopefully, you learned a little something! As always, come join the Resonym Discord server if you want to chat about game design, publishing, or just want some help troubleshooting your Datamerge.
—Max